The Objective
I always wanted to have a workspace that could replace many a tool I use as a paid alternative or tools hosted in the cloud. Specially now, when most of the time I spend at home working, I have a need to manage my productivity. It uses docker for easy siloed management and it does not require any complicated system changes that break one app or the other. Additionally Dockerhub is a treasure of images that can be run very easily and can be leveraged.
The only drawback to using docker as an app deployment tool is that all the tools run in different ports and one has to remember the mappings. The mappings are easily visible in portainer and hence useful. Another useful technique is to locally install nginx and use it as reverse proxy.
NGINX Docs | NGINX Reverse Proxy
Tools Installed
- Portainer – Visual docker/container management web app. We will use portainer to deploy containers off dockerhub.
- BookStack – Notes taking and writing management tool.
- Wekan – A trello like Kanban Board/ Lists App.
- Bitwarden Server – To store all my passwords locally and not depend on passwords.google.com or Microsoft. Bitwarden is an open-source solution with a server, web app, browser plugin and iOS/Android apps.
- Pihole – To Manage my network and conserve my bandwidth. Primarily an Adblocker and I use this to manage intrusive ads on my parents phones and desktop. This I also use to manage access to devices.
- Prometheus/Grafana – Monitor the pi and network.
- FileBrowser – To manage additional storage. Simple file manager to manage an attached storage. Simply attach a drive to the pi. Attach it to /srv to mount it to the container.

- Draw.io – Diagramming Swiss knife.
- PlantUML Server – For UML Diagramming
- Hoppscotch – REST/Web Socket Client to replace Postman
- Owncloud – Optionally I have a stopped instance of owncloud. I dont really need it as I could do with an old HDD attached to the pi.
- Code Server – Code Editor/IDE. The Visual Studio Code Server replicates the desktop app to the web. It provides most of the features the desktop editor provides.
Additionally to the above installation, we get the following as dependencies. This can be leveraged for development:
- Mongo Server
- MySQL/MariaDB – With Booksstack
- Additionally install PHPMyAdmin to manage MySQL.
Also other databases can be installed. Databases like Postgres could be run.
Rasberry PI Preparation
I have tested this in a Raspberry Pi 4gb and an 8gb, it could as well run in a 2gb version, but we may have to reduce the number of containers we host. To run docker efficiently, it is better to use a 64 bit image. I have used the raspbian beta image, however one can choose the ever so stable ubuntu server 64 for raspberry pi.
Installation Instruction follow this guide – Installing operating system images – Raspberry Pi Documentation
Disable the gui from raspi-config – raspi-config – Raspberry Pi Documentation
sudo apt-get update && sudo apt-get upgradeI have found an issue with dhcpcd when a lot of virtual networks are added:
https://github.com/raspberrypi/linux/issues/4092
sudo nano /etc/dhcpcd.conf
at the end: denyinterfaces veth*
Setup Docker & Docker Compose
wget -O - https://get.docker.com -o get-docker.sh | shInstall docker-compose:
sudo apt-get install -y python3 python3-pip
sudo pip3 -v install docker-compose
Topology

I have attached the raspberry pi 4 to the router using a RJ45 cable. Much faster as I host pihole. The Pi can be added as a WiFi device as well.
Install Portainer
The Portainer installation guide – Docker – Documentation (portainer.io). Run it in the Raspberry Pi commandline.
docker volume create portainer_datadocker run -d -p 8000:8000 -p 9000:9000 --name=portainer --restart=always -v /var/run/docker.sock:/var/run/docker.sock -v portainer_data:/data portainer/portainer-ce
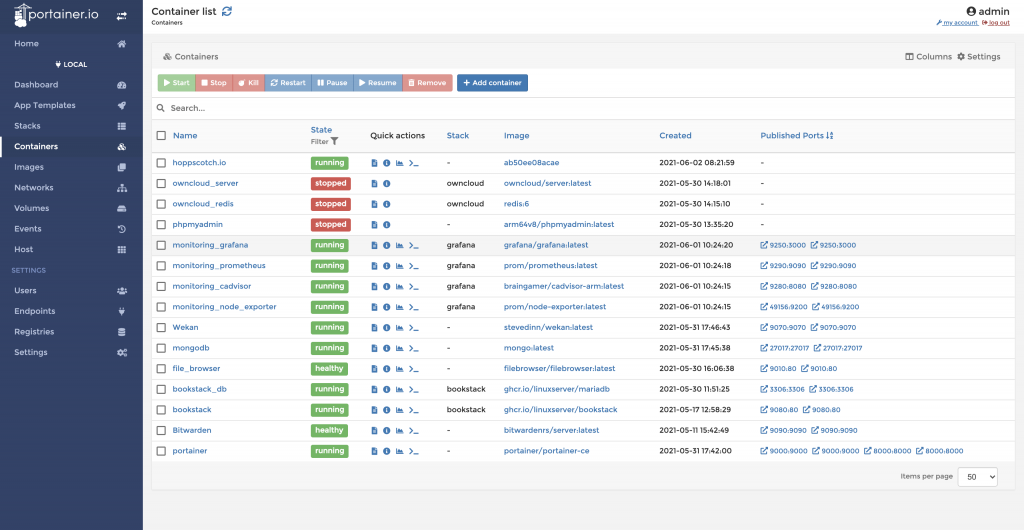
Browse to the URL of Portainer. Below is how it looks with containers.
Portainer also has App Template feature that can be used to deploy repdefined stake.

Add App from Dockerhub
In most cases the install is straight forward. Click on Containers -> Add A new container.

Choose an image with ARM 64. In the above example, we are adding an nginx server in the above. Once added to portainer, the env and storage parameters can be changed by looking at the documentation.
Add App using Docker Compose
Portainer accepts docker-compse and many stacks can be deployed using a docker-compose file.

below the compose file:
---
version: "2"
services:
  bookstack:
    image: ghcr.io/linuxserver/bookstack
    container_name: bookstack
    environment:
      - PUID=1000
      - PGID=1000
      - APP_URL=
      - DB_HOST=bookstack_db
      - DB_USER=bookstack
      - DB_PASS=bookstack
      - DB_DATABASE=bookstackapp
    volumes:
      - /path/to/data:/config
    ports:
      - 9080:80
    restart: unless-stopped
    depends_on:
      - bookstack_db
  bookstack_db:
    image: ghcr.io/linuxserver/mariadb
    container_name: bookstack_db
    environment:
      - PUID=1000
      - PGID=1000
      - MYSQL_ROOT_PASSWORD=root
      - TZ=Europe/London
      - MYSQL_DATABASE=bookstackapp
      - MYSQL_USER=bookstack
      - MYSQL_PASSWORD=bookstack
    volumes:
      - /path/to/data:/config
    ports:
      - 3306:3306
    restart: unless-stopped
Custom Install Apps using Docker Commandline
Requires an advanced understanding of Docker.
A lot of tools may not compile due to the images being built with other platform. The moment there is a “process exec” error, it is probably incompatible with arm 64. In which case the best approach is to rebuild from source using an arm based image.
Portainer automatically will pick up any images added or containers launched.
end.